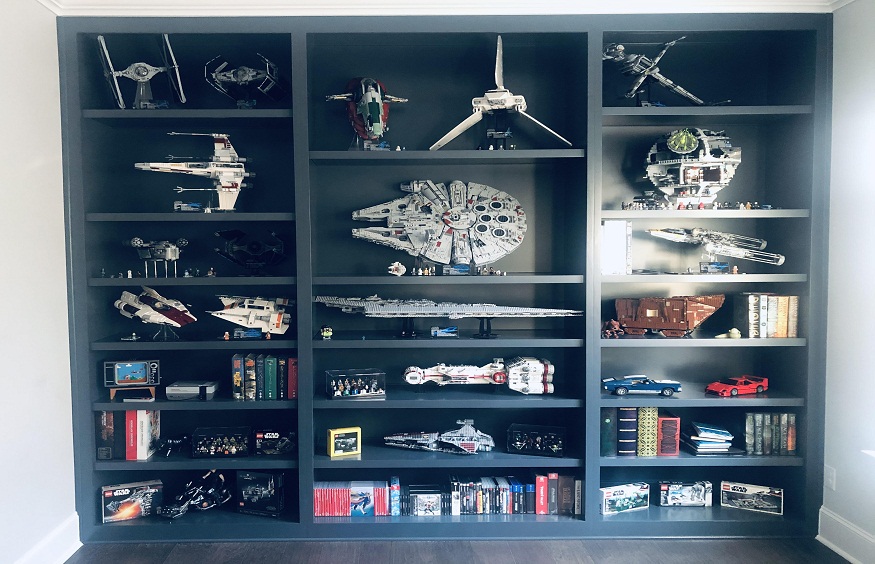
Are you a LEGO enthusiast looking for a creative way to showcase your collection? Building a custom LEGO display case can be a fun and rewarding project that allows you to personalize your space and show off your favorite sets. In this article, we will provide you with a step-by-step guide on how to build a custom LEGO display case that will not only protect your precious bricks but also enhance the overall look of your room.
Planning Your Display Case
Before you start building your custom LEGO display case, it’s important to have a plan in place. Consider the size and layout of your LEGO collection, as well as the space where the display case will be located. Measure the dimensions of your sets and decide how many shelves you will need to accommodate them. Think about whether you want a simple open shelf design or a more elaborate enclosed case with glass doors.
Choosing the Right Materials
When it comes to building a custom lego display cases, the choice of materials is crucial. You will need sturdy wood or plastic for the frame, as well as clear acrylic or glass for the shelves and doors. Ensure that the materials you select are durable and able to support the weight of your LEGO sets. Consider painting the frame in a color that complements your room’s decor for a cohesive look.
Building the Frame
Start by cutting the wood or plastic to the desired dimensions of your display case. Assemble the frame using screws or nails, making sure it is sturdy and level. If you are building a larger case, consider adding support brackets or reinforcements to prevent sagging over time. Once the frame is constructed, attach the shelves at the desired height intervals using brackets or shelf pins.
Customizing Your Display Case
After the basic structure of your lego display cases is complete, it’s time to add some personal touches to make it truly unique. Consider painting the back panel in a bold color or adding LED lights to illuminate your collection. You can also use decals or stickers to create a themed backdrop for your LEGO sets. Get creative and think outside the box to make your display case stand out.
Organizing Your LEGO Collection
Before placing your LEGO sets in the display case, take some time to organize them by theme, color, or size. Consider using small bins or containers to keep loose pieces together and label them for easy identification. Arrange your sets in a visually appealing way, alternating colors and sizes for a balanced look. You can also use risers or display stands to create depth and dimension in your display.
Maintaining Your Display Case
Once your custom LEGO display case is complete and your sets are neatly arranged, it’s important to maintain it regularly. Dust the shelves and surfaces with a soft cloth or duster to keep them clean and free of debris. Avoid placing your display case in direct sunlight or near heat sources to prevent discoloration or damage to your LEGO sets. Periodically check the stability of the frame and shelves to ensure everything is secure. In conclusion, building a custom LEGO display case is a fun and creative way to showcase your collection and add a personal touch to your space. By following these steps and tips, you can create a display case that not only protects your precious LEGO sets but also enhances the overall look of your room. So gather your bricks and get ready to build your very own custom LEGO display case today!
Learn how to build a custom LEGO display case to showcase your collection in style. Follow our step-by-step guide for a fun and rewarding project.


